Instructions tested with a Raspberry Pi 2 with an 8GB memory card. Probably also works fine on a Raspberry Pi 3.
Steps
Download the
latest
Raspbian Jessie Light
image
. Earlier versions of Raspbian won't work.
Write it to a memory card using
Etcher
, put the memory card in the RPi and boot it up.
Log in. Default username / password is
pi
/
raspberry
.
Set up Wifi (if you are using Wifi)
according to the Raspberry Pi instructions
.
Run
sudo raspi-config
and configure the basics:
-
Set up your keyboard layout (It defaults to a British keyboard layout)
-
Change default user password
-
Enable the Raspberry Pi camera (if you have one attached)
-
Configure gpu memory split under 'Advanced'. Set it up '16'.
-
Save changes and reboot.
Install required libraries with these commands:
sudo apt-get update
sudo apt-get upgrade
sudo apt-get install build-essential \
cmake \
gfortran \
git \
wget \
curl \
graphicsmagick \
libgraphicsmagick1-dev \
libatlas-dev \
libavcodec-dev \
libavformat-dev \
libboost-all-dev \
libgtk2.0-dev \
libjpeg-dev \
liblapack-dev \
libswscale-dev \
pkg-config \
python3-dev \
python3-numpy \
python3-pip \
sudo apt-get clean
Install the picamera python library with array support (if you are using a camera):
sudo apt-get install python3-picamera
sudo pip3 install --upgrade picamera[array]
Temporarily enable a larger swap file size (so the dlib compile won't fail due to limited memory):
sudo nano /etc/dphys-swapfile
< change CONF_SWAPSIZE=100 to CONF_SWAPSIZE=1024 and save / exit nano >
sudo /etc/init.d/dphys-swapfile restart
Download and install dlib v19.6:
mkdir -p dlib
git clone -b 'v19.6' --single-branch https://github.com/davisking/dlib.git dlib/
cd ./dlib
sudo python3 setup.py install --compiler-flags "-mfpu=neon"
Install
face_recognition
:
sudo pip3 install face_recognition
Revert the swap file size change now that dlib is installed:
sudo nano /etc/dphys-swapfile
< change CONF_SWAPSIZE=1024 to CONF_SWAPSIZE=100 and save / exit nano >
sudo /etc/init.d/dphys-swapfile restart
Download the face recognition code examples:
git clone --single-branch https://github.com/ageitgey/face_recognition.git
cd ./face_recognition/examples
python3 facerec_on_raspberry_pi.py
Totally Optional: If you want a desktop GUI, install PIXEL:
sudo apt-get install --no-install-recommends xserver-xorg xinit raspberrypi-ui-mods
在linxu环境下实现了face_recognition的运行后(参考:https://gist.github.com/ageitgey/1ac8dbe8572f3f533df6269dab35df6...
来自:
u011304078的博客
最近看了个通过人脸识别依赖库face_recognition和图像识别库Pillow对一张人物图片进行美颜 等相关操作,代码也不多三十行左右,然后冠挺有意思的,就去尝试了一下,结果在安装这个人脸识别依...
来自:
karmacode的博客
在前面说过,树莓派上使用face_recognition是十分慢的,这里讲解一下作者自己的提速方法:face_recognition在不同机器上识别时间对比可能是因为我在树莓派上使用了多线程,open...
来自:
HiLcc
首先是face_recognition安装一、到github上面查找中文资料,然后查看树莓派安装教程https://github.com/ageitgey/face_recognition树莓派安装的...
来自:
gonepoo的博客
face_recognition简介这是世界上最简单的人脸识别库了。你可以通过Python引用或者命令行的形式使用它,来管理和识别人脸。该软件包使用dlib中最先进的人脸识别深度学习算法,使得识别准确...
来自:
小俊同学的博客
该项目是开源项目,可以在 GitHub 上面找到。如何在树莓派上安装,参考这篇官方手册此外,我主要参考这几篇文章,史上最简单的人脸识别项目登上GitHub趋势榜face_recognition移植至树...
来自:
清风冰竹
win7系统,Python3.5版本,已经成功安装dlib 库,当pip install face_recognition时,
为什么还会出现Failed building wheel for dlib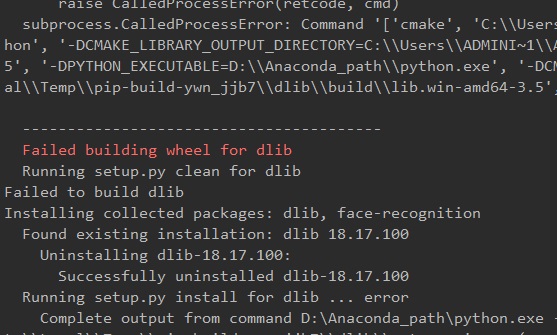
Raspberry Pi上安装dlib, face_recognition记录安装流程主要参考流程主要参考网址:https://gist.github.com/ageitgey/1ac8dbe8572...
来自:
weixin_42764123的博客
python最好是3.6的版本,2.7的也可以,记得区分x86和x64python的传送门https://www.python.org/getit/cmake打包用cmake的传送门https://c...
来自:
Enn的数据库
Instructions tested with a Raspberry Pi 2 with an 8GB memory card. Probably also works fine on a Ras...
来自:
心核智慧科技. 初创企业最佳. 技术合伙人. 新零售升级专家
针对github上:https://github.com/Mjrovai/OpenCV-Face-Recognition$pip3installopencv-python#安装opencv$pip3i...
来自:
小白笔记本
原文地址:https://www.pyimagesearch.com/2018/06/25/raspberry-pi-face-recognition/In last week’s blog post...
来自:
Anton8801的博客
face_recognition 是个和人脸识别相关的很有用的库,安装起来还有点麻烦。1.先安装dlib,这个库虽然提供python接口,直接使用 pip install dlib或者安装.wheel...
来自:
liguandong
参考:https://www.hackster.io/mjrobot/real-time-face-recognition-an-end-to-end-project-a10826opencv安装:h...
来自:
Sunshine_victory的博客
分享我在使用树莓派3B搭载ubuntu mate上安装face_recognition的过程,中间有一些遇到的问题我想记录下来 避免以后再掉进坑里。安装face_recognition这个模块之前 需...
来自:
zj1123583454的博客
pip install cmakepip install boost下载https://pypi.org/simple/dlib/pip install dlib-19.8.1-cp36-cp36m-...
来自:
有梦想的润森边学边写
环境:ubutu16.04,python2.7、python3.5都可以在线安装和按网上的一些文章都是了一遍,都没成功,总是报错折腾半天还是成功了下载这个dlib-19.7离线压缩包(低于19.7的版...
来自:
学习、记录、分享
最近在学校里折腾树莓派上的人脸识别,折腾了很久才能用在此记录下使用的过程和遇到的困难过程基于超有趣!手把手教你使用树莓派实现实时人脸检测完成的。其中前面opencv的安装是文章中的RaspbianSt...
来自:
myweihp的博客
设备和环境:1、树莓派3b;2、ubuntu mate系统 linux内核是4.4.38; 功能需求:1、调用dlib实现人脸识别。 可行性研究:1、dlib安装的库有多大?分析:windows下d...
来自:
天道酬勤
你将要做的有:准备材料选择系统建立基础桌面建立你需要准备:1.随便什么版本的Raspberry Pi2.带桌面或者不带桌面的Raspbian 系统镜像3.SD / MicroSD卡(至少4GB或更高)...
来自:
GloomyGhost‘s Blog
最近看了新闻《人工智能可以换脸网友做出定制成人电影》看到使用深度学习技术更换视频中脸,想想不好好学学以后a片都没得看,正好过年有空就看了一下。github搜索faceswap即是开源的代码。正好有例子...
来自:
无尽星空--帝王铠
在直接pip安装face_recognition时,安装dlib时会报错,编译安装时也报了奇怪的错..最后发现是依赖关系没解决。下面直接贴出安装步骤:step 1. 安装相关依赖# for macOS...
来自:
AlexTan_的博客
我的环境ubuntu 16.04 LTSpython是2.7.12 其他应该也可以1. 环境搭建安装 git 、cmake 、 python-pip# 安装 git $ sudo apt-get in...
来自:
chun307的博客
昨天晚上折腾3个小时,在window下没有安装好face-recognition,今天下午在公司把linux安装情况搞定了,晚上回家后还是想把windows下的安装弄好,就又抱着试一试的态度尝...
来自:
ArhatShaw的专栏
face_recognition是一款免费、开源、实时、离线的Python人脸识别库。Github网址为https://github.com/ageitgey/face_recognition。如安装...
来自:
五蕴皆空
ETH:重磅!手把手教你如何生成以太坊钱包!目录创建ETH钱包步骤1、进入官网2、保存钱包 3、保存私钥4、解锁5、钱包交易创建ETH钱包步骤1、进入官网点击链接https://www.myether...
来自:
一个处女座的程序猿
应用一个基于Python的开源人脸识别库,face_recognition,人脸检测基于dlib,dlib依赖Boost和cmake,这是从github上clone下来的dlib文件 相关下载链接:/
http://v.eepw.com.cn/video/play/id/14049 我是根据这个来做的,一开始真是无从下手,妈蛋也不说源代码就在上传到github了,就在那里调几条代码讲讲讲,要不是看...
来自:
sinat_20276189的博客
看到一句话,如果你写代码没有写诗一样的感觉,那你不适合做程序猿!还是直接上代码吧:import requestsfrom json import JSONDecoderimport cv2import...
来自:
MachineLP的专栏
Install this module from pypi using pip3 (or pip2 for Python 2):pip3 install face_recognitionIMPORTA...
来自:
qq_24968377的博客
face recognition视觉库使用一:在linux和Windows环境下进行环境资源配置 Face recognition是一个简易的进行封装的人脸识别库,利用dlib库用深度学习的方法...
来自:
Im1smb的博客
step 1. 安装相关依赖MacOSbrew install cmake brew install boost brew install boost-python –with-python3Ubun...
来自:
TimorChow的博客
原文链接:WindowsInstallationTutorial目录目录IMPORTANTRequirmentsInstallationIMPORTANT实际上face_recognition这个项目...
来自:
浪潮之巅的专栏
win10+Anaconda+python3S1.安装AnacondaS2.打开Anaconda Prompt 输入:conda install -c menpo dlib 前提是你装了Annacon...
来自:
P0ny的博客
CV之IG:图像生成(Image Generation)的简介、使用方法、案例应用之详细攻略目录图像生成(Image Generation)的简介图像生成(Image Generation)的使用方法...
来自:
一个处女座的程序猿
点击上面↑「爱开发」关注我们每晚10点,捕获技术思考和创业资源洞察什么是ThreadLocalThreadLocal是一个本地线程副本变量工具类,各个线程都拥有一份线程私......
来自:
爱开发
树莓派3B开热点并自动启动
qq_31625575:
请问 “sudo create_ap wlan0 热点名 密码”是什么意思,可以写成 "sudo create_ap wlan0 SMP 123456789", wifi名字:SMP 密码:123456789 吗?
espeak 用法
qq_37586270:
声音不标准啊 ,这玩意
Windows 下 python ...
weixin_40890984:
代码中的error不影响吗
树莓派+RC522模块
qq_44949030:
你解决了吗

